Windows 11 makes it easy to capture screenshots to share information, document issues, or create tutorials. There are multiple methods available depending on your preferences and needs. This guide will walk through the various built-in options for taking screenshots on Windows 11.
Contents
Use the Print Screen Button
The easiest and oldest way to take a basic screenshot is by using the Print Screen (PrtScn) button. This button captures and copies the entire contents of your display, so everything visible on your screen will be captured.
1. Open the window or program you want to capture in the screenshot
2. Press the Print Screen button on your keyboard
This typically appears in the upper right corner next to scroll lock. It will have “prt sc” or similar written on it.
3. Open an image editing program like Paint and paste (Ctrl + V)
This will allow you to save the screenshot as an image file. You can also paste directly into a document or email.
The main benefit of the Print Screen button is quick and easy full screenshots. However, it lacks options for capturing specific parts of the screen.
Use Snip & Sketch or Snipping Tool
For more control and more advanced features, use the Snip & Sketch app or the Snipping Tool. They are the same thing as Microsoft has replaced the Snipping tool with Snip and Sketch but it is sometimes called Snipping Tool on older machines. Snip & Sketch allows choosing what to capture and adds annotation tools. Microsoft have updated it recently to add eve more features than before.
1. Press Windows + Shift + S to open the snipping toolbar
Alternatively, open Snip & Sketch or Snipping Tool from the start menu.
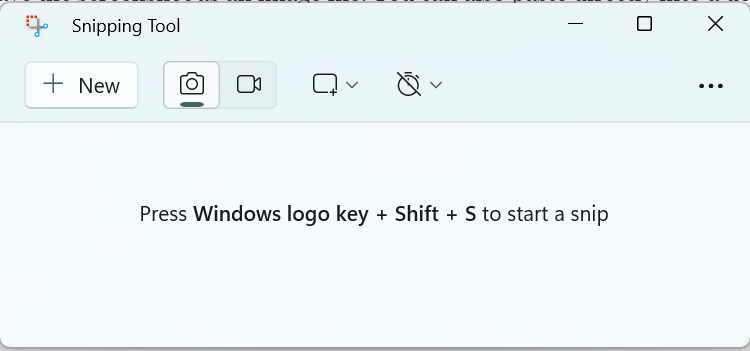
2. Click New to start a new screenshot
The screen will dim to indicate that you can select an area to copy. You can also set a delay before the screenshot process starts. This can be helpful if you want to take a screenshot of a drop down menu that disappears when you hover off it for example. You also have the option of snippet using a rectangle, freeform, the screen or just a specific window.
3. Drag cursor across the part of the screen you want to capture
Lifting the cursor captures the defined area.
4. The screenshot opens in Snip & Sketch
Here is where you can make additional changes and additions to your screenshot. These include annotations and highlights.
5. Save the screenshot as an image or PDF file.
Note you can save the screenshot using the save button, however the screenshots are also automatically saved in your pictures folder within a screenshots folder. You can also copy to your clipboard and then paste in Word or an email.
You can also use this tool to capture video as well as images.